Windows Compact setup
This guide covers setting up the Midnight development environment on Windows using Windows Subsystem for Linux (WSL). We'll walk you through the essential setup steps, including installing and configuring WSL, Docker Desktop, and the Midnight Lace wallet.
By the end of this tutorial, you'll have a development-ready environment for building DApps on the Midnight Network, running the proof server, and interacting with the network.
Install Ubuntu
Developing DApps for the Midnight network often requires compiling and running various components (like the proof server or complex scripts) that are traditionally Linux-based. The Windows Subsystem for Linux (WSL) is a critical component that allows you to run a native Linux environment directly within Windows without the overhead of a traditional virtual machine.
Step-by-step installation:
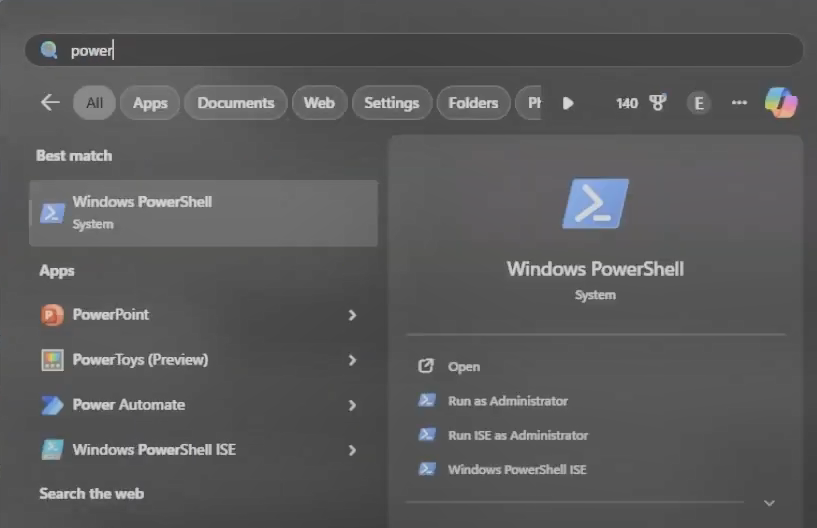
Open the Start Menu on your Windows desktop.
Search for Windows PowerShell (or Command Prompt) and right-click on the result. Select Run as administrator. This elevation is necessary to install system-level features like WSL.
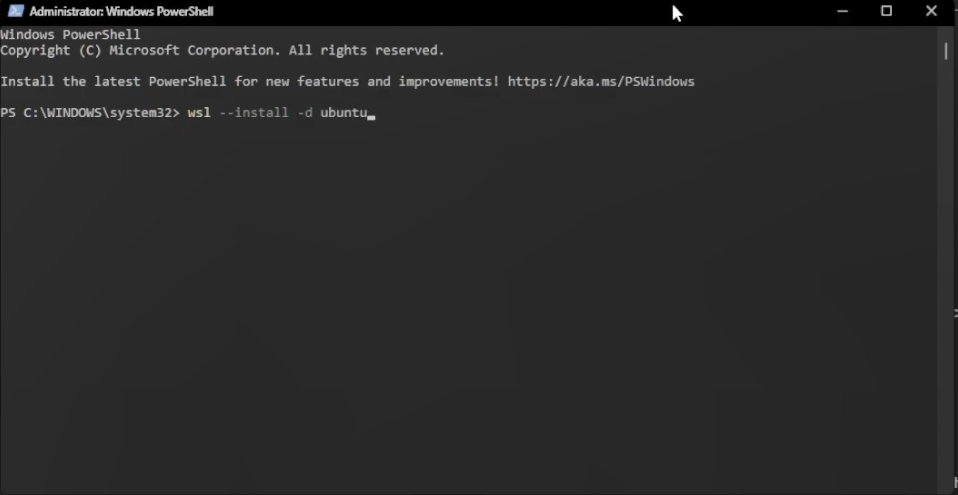
In the command terminal, enter the following streamlined installation command:
wsl --install -d ubuntu
This command performs three primary functions automatically: It enables the required Windows features for WSL (Virtual Machine Platform and Windows Subsystem for Linux). It downloads and installs the recommended Ubuntu distribution (the default and most widely supported Linux environment).
It restarts the necessary services.
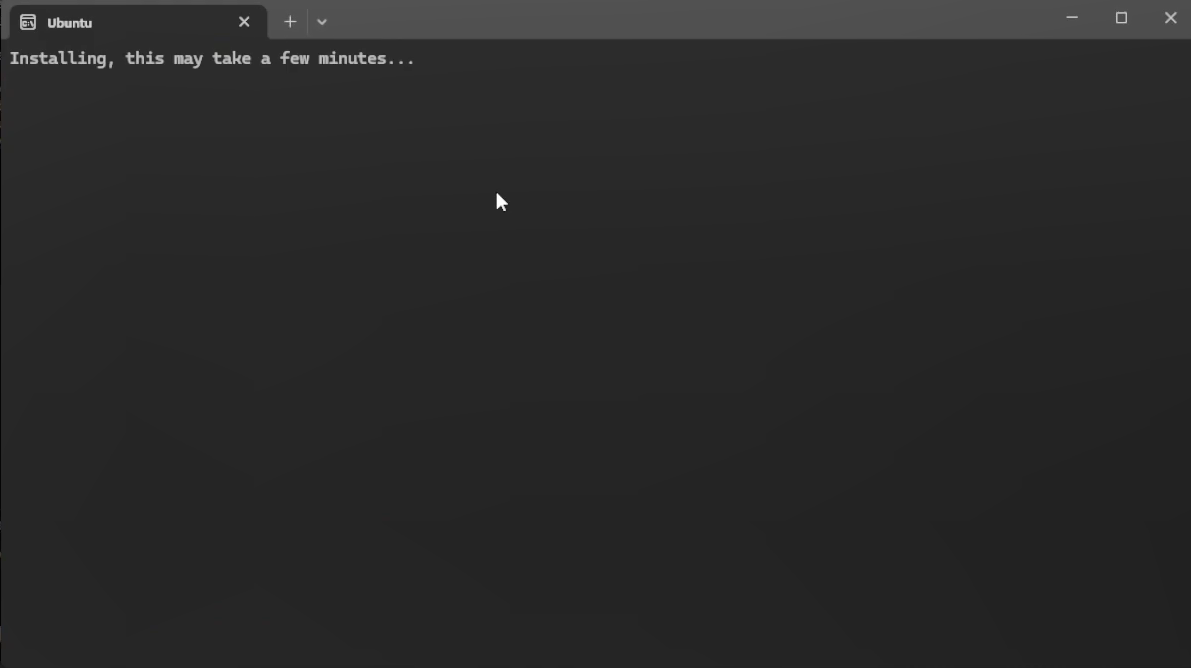
The initial download and installation of the required components and the Ubuntu image can take anywhere from 5 to 15 minutes, depending on your internet connection and system speed. Do not close the window until the process is complete.
After the installation process completes, a new Ubuntu terminal window will open automatically. You will be prompted to create a UNIX username and a password.
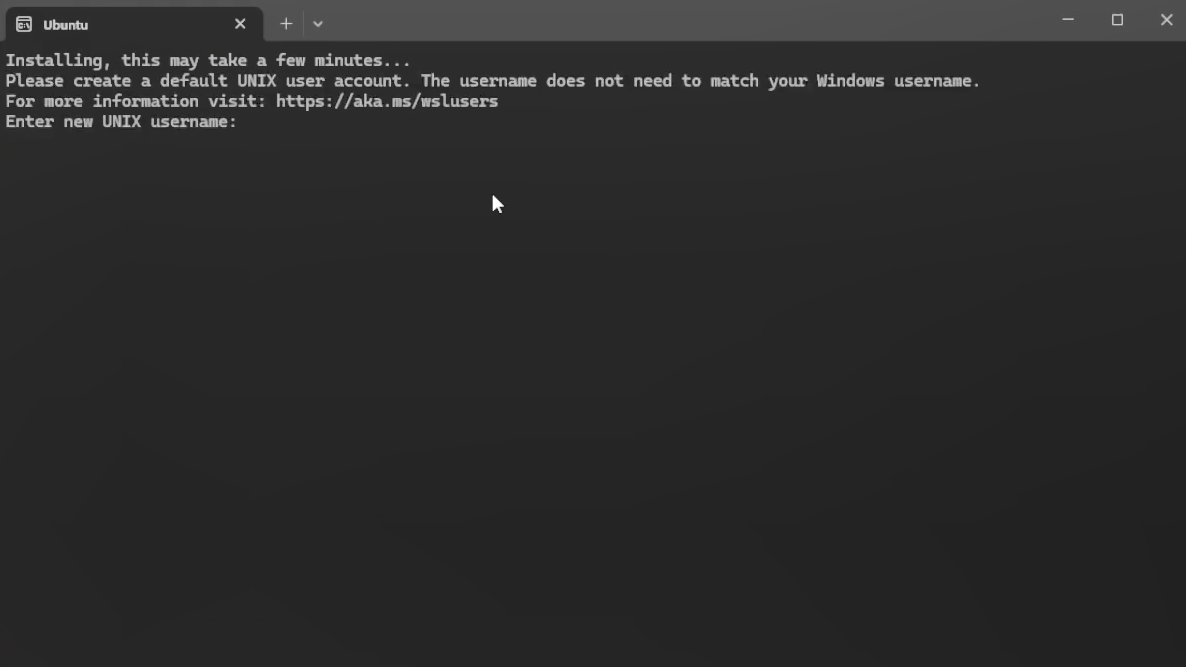
When entering your password, the characters will not be displayed on the screen for security reasons (this is standard Linux terminal behavior). Type your desired password carefully and press Enter.
Once successfully configured, your new username will be displayed as part of your terminal prompt (for example, yourusername@DESKTOP-XXXXXX:~$).
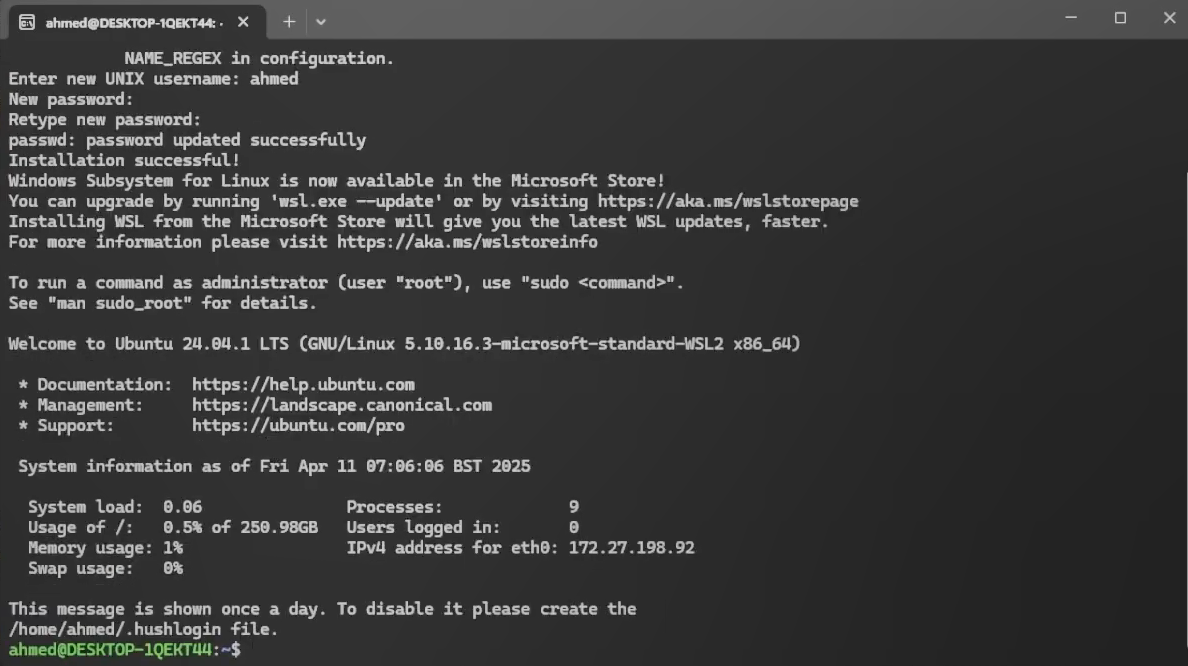
This confirms that WSL is correctly installed and the Ubuntu distribution is ready for use.
Verification and best practices
To ensure WSL is running the correct version, you can execute this command in the Windows PowerShell:
wsl -l -v
You should see a list showing Ubuntu and confirming its STATE is Running (or Stopped) and its VERSION is 2 (WSL 2 is required for optimal performance and Docker integration).
Install and configure Docker desktop
Open your preferred web browser and navigate to the official Docker website at docker.com/products/docker-desktop.
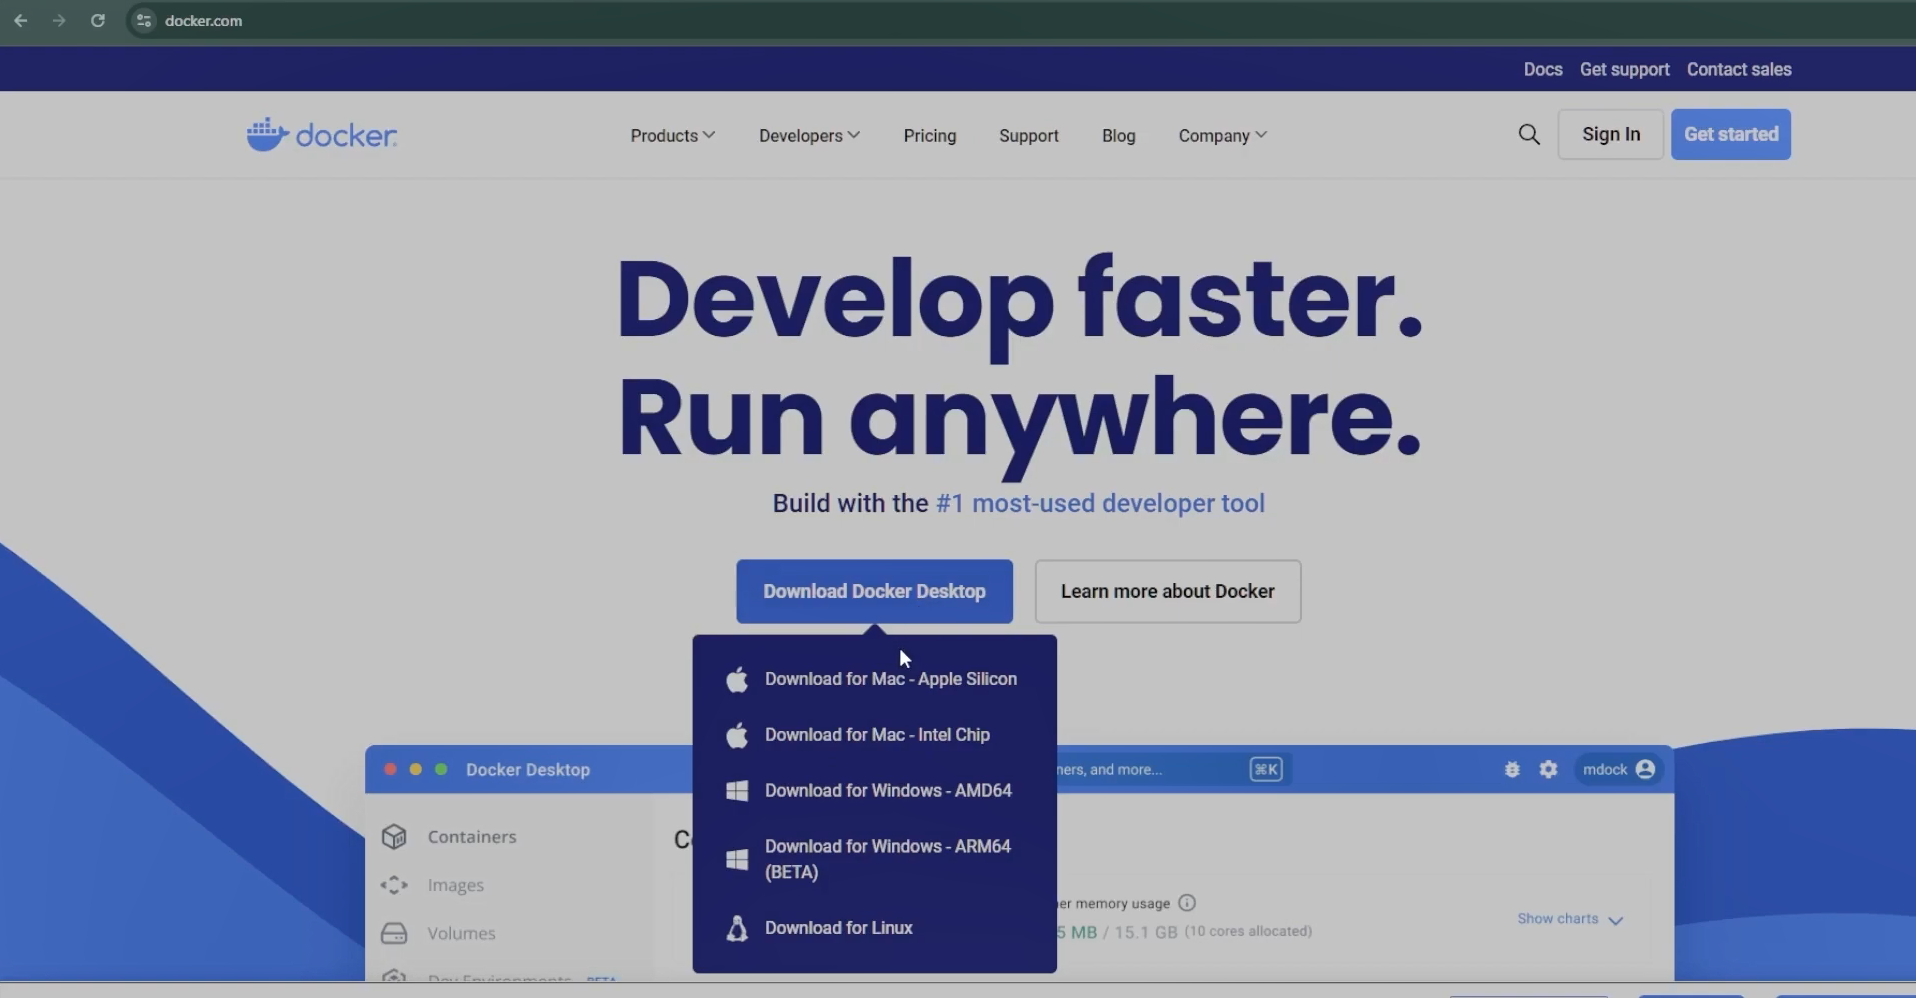
Look for the Docker Desktop for Windows download link. Ensure you download the installer that matches your CPU architecture (for example, Windows - AMD64 for modern systems).
Run the downloaded installer (for example, Docker Desktop Installer.exe). During the installation, make sure the box for Use WSL 2 instead of Hyper-V is checked. This is vital for Docker to integrate seamlessly with the Linux environment you just set up.
Follow the prompts to complete the installation. A system restart may be required.
After the reboot, launch Docker Desktop from your Start Menu. It will take a few moments to start up, showing the whale icon in your system tray.
Verification and integration
Once Docker Desktop is running, open the Settings menu (the gear icon).
Click Resources, then navigate to the WSL integration tab.
Ensure that the Enable integration with my default WSL distro option is toggled ON, and specifically verify that your Ubuntu distribution is enabled. This connection allows Docker to manage containers directly from your Linux terminal.
Set up and run the midnight proof server
The Midnight Proof Server is the core component that your DApps will communicate with to execute zero-knowledge proofs and transactions. It is run via Docker for consistency.
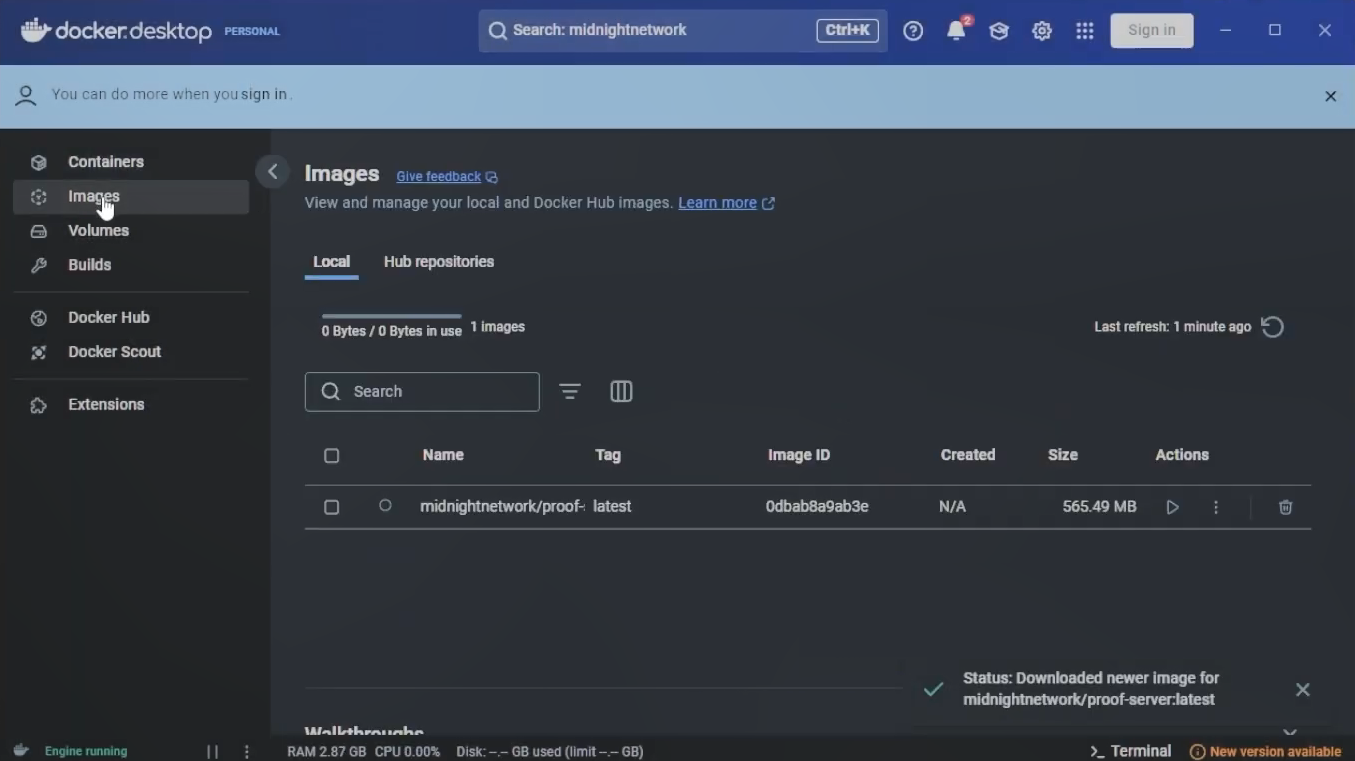
Download the Docker image
Open your Docker Desktop application and navigate to the Explore section (or use the search field at the top). Search for midnightntwrk/proof-server and download the latest image.
Run the proof server
To start the proof server, open your Ubuntu terminal and run the following command:
docker run -p 6300:6300 midnightntwrk/proof-server:7.0.0 -- midnight-proof-server -v
You should see output similar to:
actix_server::server: starting service: "actix-web-service-0.0.0.0:6300", workers: 14, listening on: 0.0.0.0:6300
Keep this terminal window open. The proof server must stay active to compile and deploy contracts.
Install the Compact compiler
Compact is Midnight's smart contract language. Since you are using a Windows machine, you must install the compiler inside your WSL Ubuntu terminal to ensure it works with the rest of the Midnight toolchain.
- Open your Ubuntu terminal (WSL).
- Run the following command to install the Compact binaries:
curl --proto '=https' --tlsv1.2 -LsSf https://github.com/midnightntwrk/compact/releases/latest/download/compact-installer.sh | sh
- The installer script automatically updates your path. To apply these changes to your current session, reload your shell configuration:
source ~/.bashrc
- Verify the installation by checking the version:
compact --version
- Update to the latest version to ensure you have the most recent features:
compact update
Install the Compact VS Code extension
The Compact VS Code extension provides syntax highlighting and real-time error checking, which is essential for writing smart contracts.
- Download the Compact VS Code extension VSIX package from the releases page.
- Open VS Code.
- Go to the Extensions view (press
Ctrl+Shift+X), click the ... (More Actions) menu at the top-right of the extensions pane, and select Install from VSIX.... - Select the
.vsixfile you just downloaded to complete the installation.
Next steps
Now that your environment is ready, you can begin building. To get started and write your first smart contract, refer to the hello world tutorial.